
Admin & Settings
Organisation details and preferences
The basics every other part of the product reads: your company name, country and timezone, what you call your own roles, how often you run pay, and how the system talks to people.
Step by step
- 1
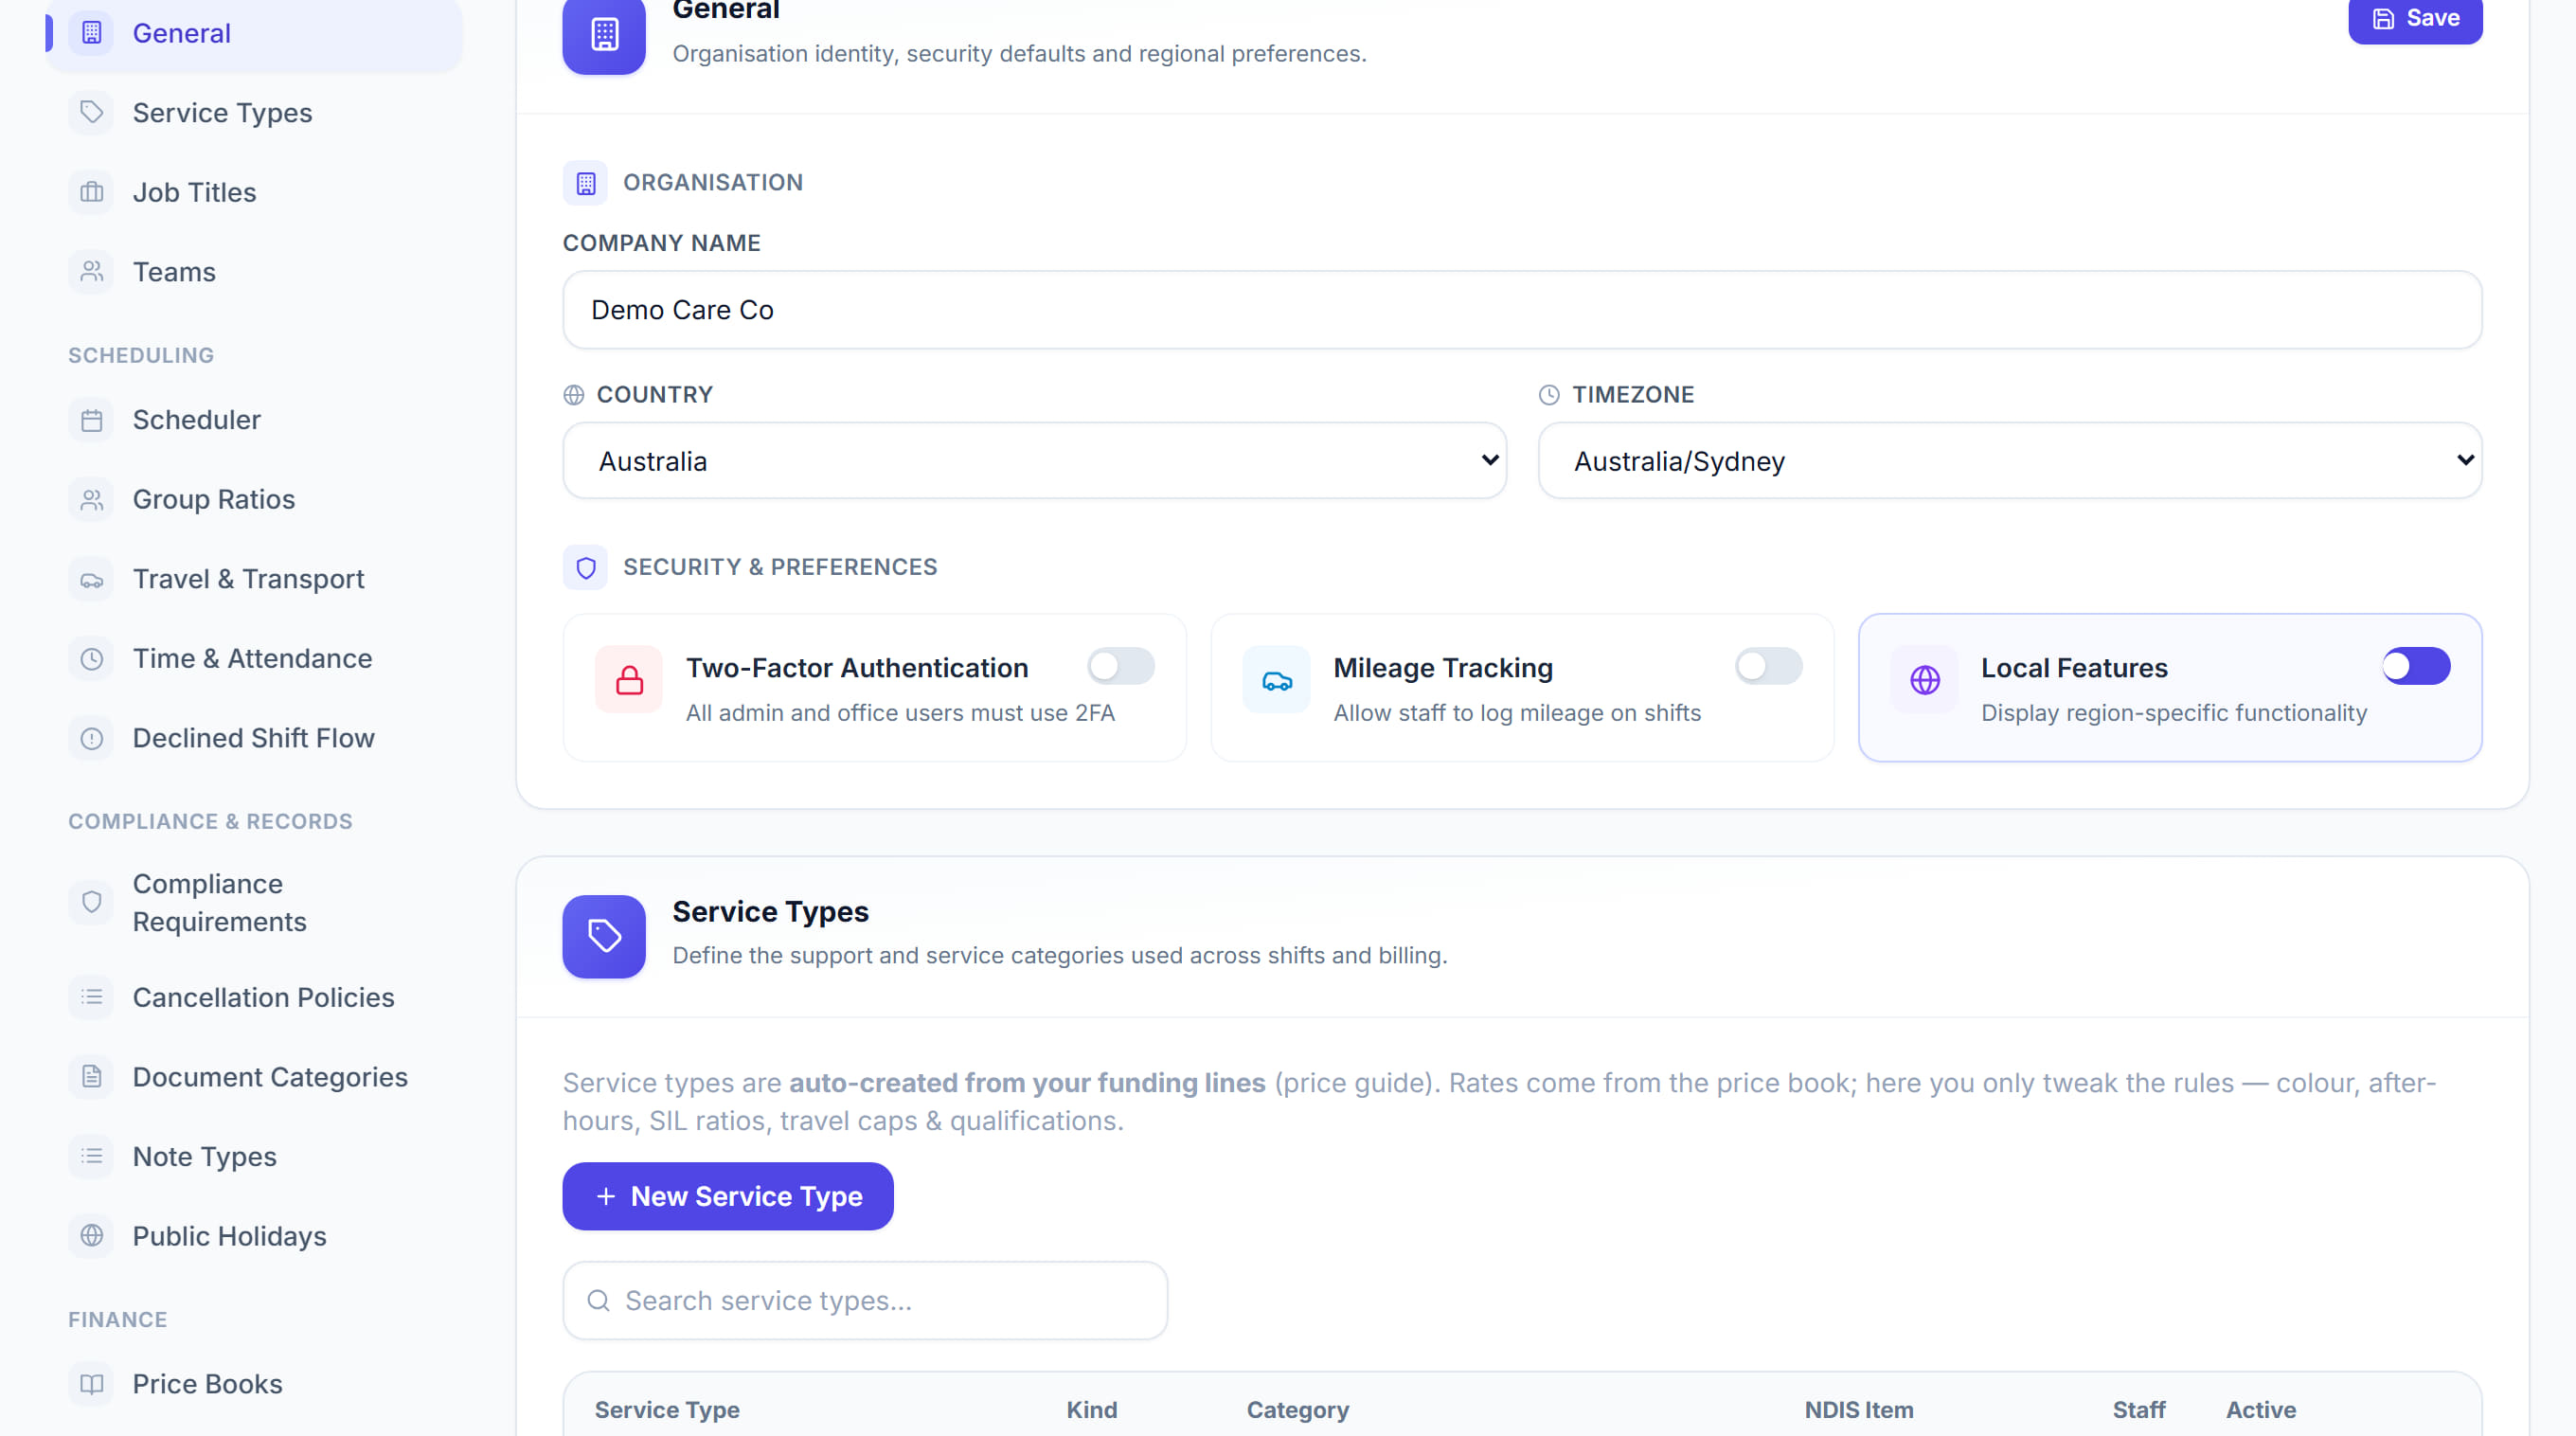
Open Settings and stay on the General tab.

- 2
Set the Company Name. It appears on the screen and on exports.

- 3
Set the Country and the Timezone. The timezone decides what "today" means on the scheduler and when a shift crosses into penalty hours, so it has to be your operating timezone rather than a head-office one.

- 4
Under the role names, set what you call a Support Worker, the alternative worker title, and the Office / Coordinator role. Rostery uses your words rather than its own throughout.

- 5
Set the Client Types you use — the Aged Care levels and the NDIS management types (NDIS Managed, Plan Managed, Self Managed). These are what you choose from on a participant.
- 6
Set Pay Run Frequency and Pay Run Start Day to match your actual pay cycle.
- 7
Set the Communication Mode for how notifications reach people.
- 8
Click Save.
The screen
Did this answer your question?
If not, talk to us — we answer from Australia, in business hours.