
Scheduling
Scheduler
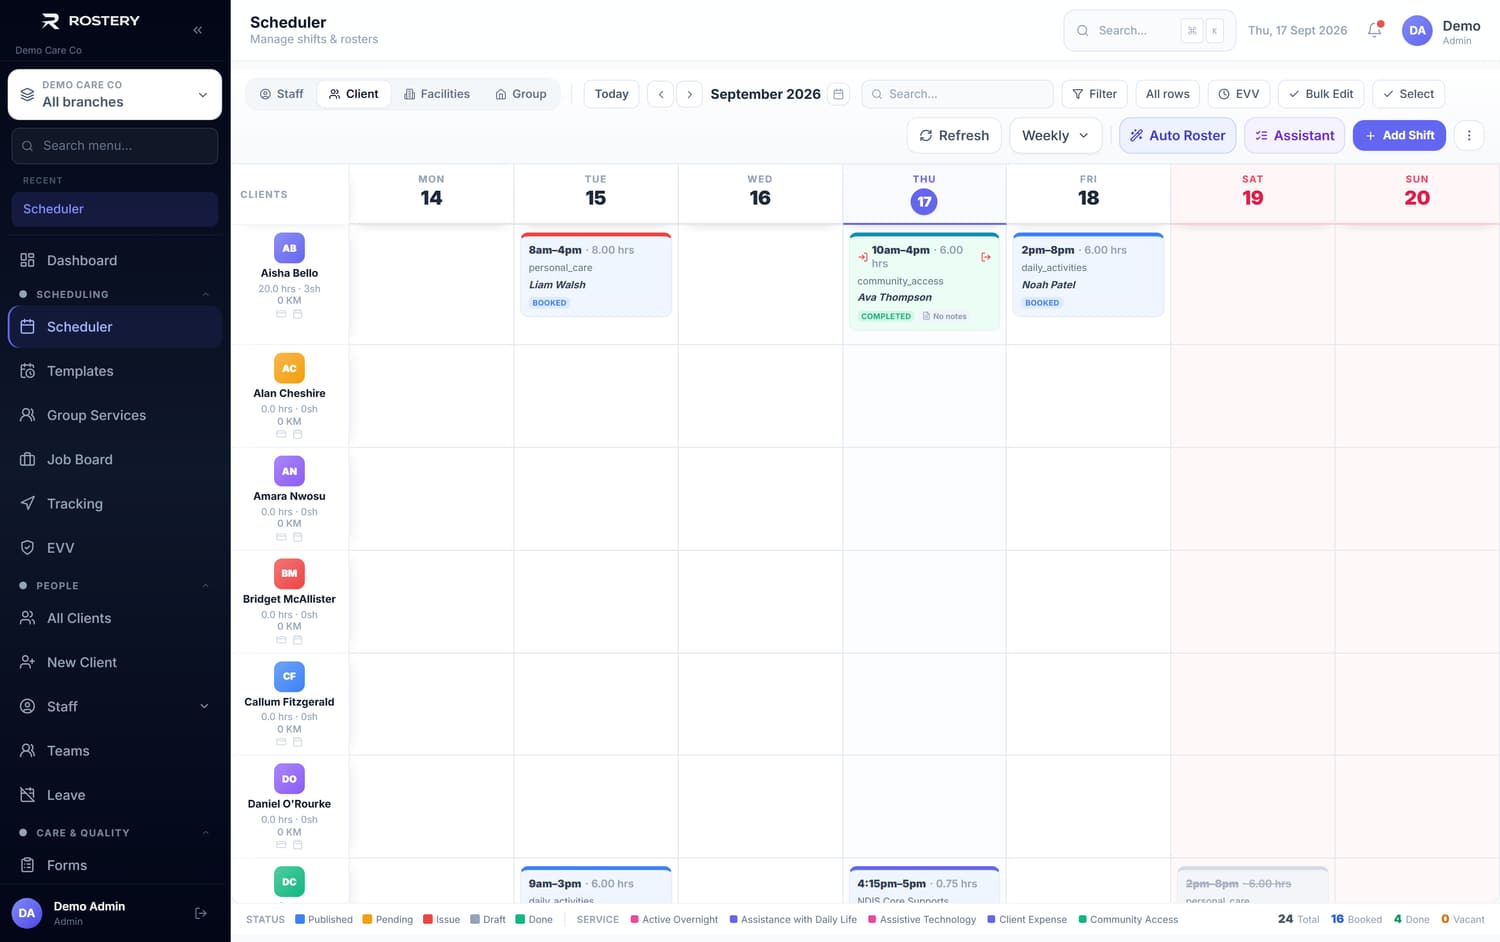
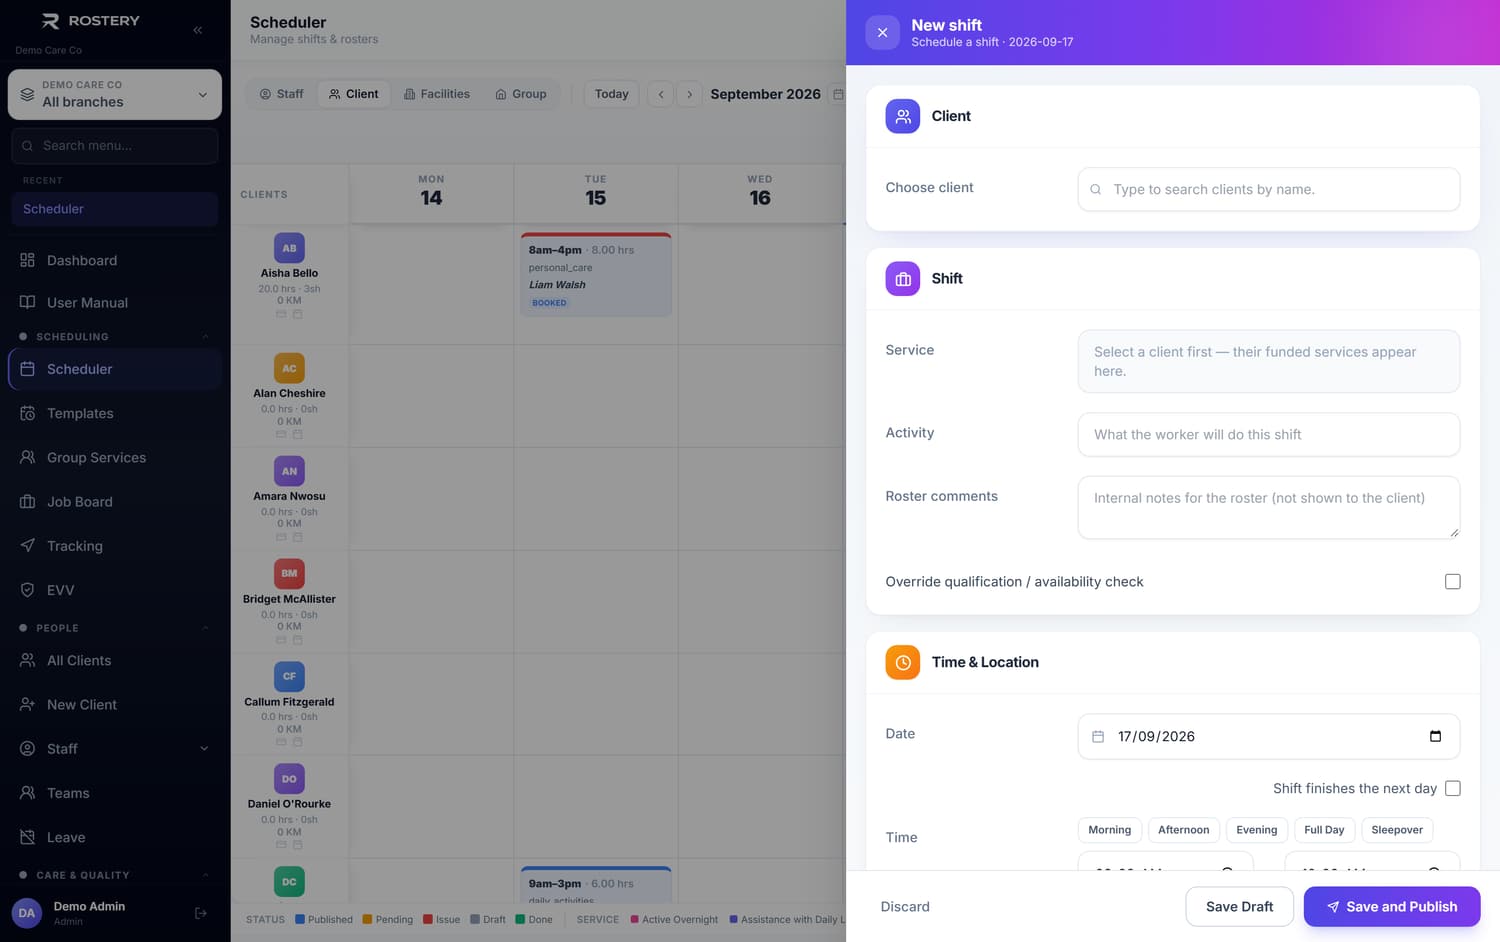
/scheduler11 stepsThe roster board, and the screen most of the day happens on. It shows every shift for the period — by worker or by participant — and it is where shifts are created, filled, moved, published and cancelled. The coloured edge on each card is its status: Draft, Pending, Booked, Completed, or Cancelled.
Step by step
- 1
Choose the period and the grouping first. The controls above the board switch between day, week and fortnight, and between a row per staff member and a row per participant. Grouping by participant answers "is this person covered"; grouping by staff answers "is this worker over their hours".
- 2
Narrow what you are looking at with Filters. You can filter by Shift Status (Booked, Completed, Cancelled, Pending, Draft), by Shift Type, and by publish state — All Shifts, Published Only, or Unpublished Only. Sort By offers Name A–Z, Hours High–Low, and Shifts Count, which is how you find who is carrying too much.
- 3
Create a shift by clicking an empty cell in the grid, or with New Shift. Pick the participant and the service; the charge rate resolves from the price book attached to that participant and the pay rate from the worker’s pay group, so both are filled before you type anything.
- 4
Set the time and the shift type. Morning, Afternoon, Evening, Full Day and Sleepover are presets — a Sleepover is priced differently, so choose it rather than typing the hours.
- 5
Assign the worker. Drag the card onto their row, or open the shift and use the recommendation list: it ranks people by qualification match against the participant’s support needs, by availability, and by travel. Workers on approved leave are excluded automatically.
- 6
Watch for a red edge before you move on. It means validation has something to say — an overlap with another shift, a missing charge or pay rate, or a worker without a qualification the participant’s plan requires. Open the shift and the reason is named at the top. A missing rate is the one worth fixing immediately; it bills at zero.
- 7
Publish when the roster is ready. Until a shift is published the worker cannot see it in the app, and publishing is what sends the notification. Unpublished Only in the filter shows you what is still invisible to staff.
- 8
To move a shift, drag it and confirm. If it is part of a repeating series you are asked whether the change applies to This Only, This + Future, or All in Series — choose deliberately; All in Series rewrites history as well as the future.
- 9
To cancel, open the shift menu and choose Cancel Shift, then pick a cancellation policy and a reason. The policy decides what the participant is charged and whether the worker is still paid. It is not a delete, and the shift stays on the board marked Cancelled or Cancelled (charged).
- 10
A cancellation made in error can be reversed with Uncancel Shift, which restores the original status and removes the charge.
- 11
Duplicate copies a shift complete with its participant, service and rates — quicker than building a similar one from scratch.
The screen
Did this answer your question?
If not, talk to us — we answer from Australia, in business hours.